Click >Purchasing >Enter/Edit Purchase Order
Create Manual Purchase Order Using Bar Code Scanner or Keyboard
On the Purchase Order NAV View, select the PO you wish to edit or click the NEW button. The list of Purchase Orders includes those that were entered manually as well as those that were converted from Worksheets.
Note that PO's created and submitted in Central cannot be EDITED in the store(S). PO's created in Central are RECEIVED in the store(s).
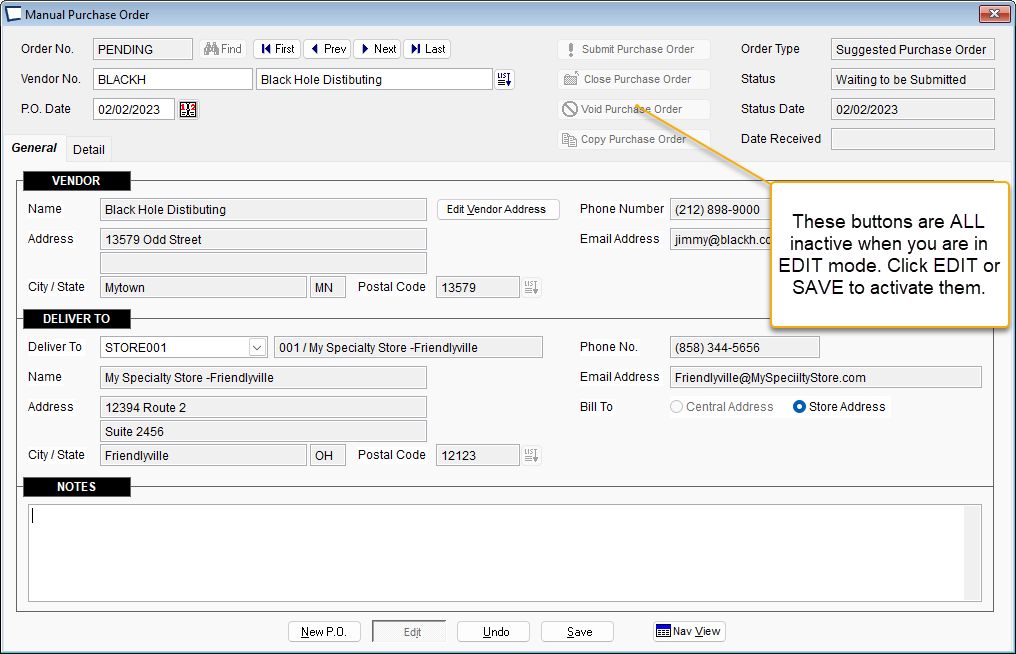
Submit Purchase Order Button -changes order status from suggested to submitted. The item at location tab will reflect the change.
Close Purchase Order Button -used when you are done receiving items on the order, and some items have not been received. Marks the order as closed and updates the On Order Quantity for the items that were still open.
Void Purchase Order Button -cancels the PO. Only available if no receiving has been done on the order. If receiving has been done, you could use the Close Purchase Order button.
Copy Purchase Order Button -see Copy Purchase Order
On the General tab choose the Vendor, Delivery Address(es) and where the order is to be Billed To. Options vary depending on whether you are in a Central or Store Acme.
|
In Central the Deliver To choices are:
•CENACME: Tells the Vendor to deliver all goods on this order to the address of your Central Acme. Items are still earmarked for their individual stores, during creation of the Purchase Order. When the goods arrive at Central, print a receiving document to check the order in. Disperse the items to the stores, then Receive Purchase Order at each of the stores.
•ALLSTORES: Each Store that you have included on the P.O.
•CUSTOM: Custom Address -the address controls become active and delivery address can be entered.
•Any one of the satellite stores.
In Satellite or Single Stores the Deliver To choices are:
•CENACME: Central Acme. When the goods arrive at Central, print a receiving document to check the order in. Disperse the items to the store, then Receive Purchase Order at the store.
•This Store: the store you are working at.
•CUSTOM: Custom Address -the address controls become active and delivery address can be entered.
The bill to section has two choices:
1.Central Address: the store 000 address is printed in the upper left hand corner of a purchase order; this address is used regardless of where the goods are delivered. In central Acme, if a custom delivery address is used, the bill to address is forced to central.
2.Store Address: if there are multiple stores on the P.O. then each store’s P.O. has the store’ address on it. If the Acme is a satellite or single store Acme, then this choice is locked to store address.
The following buttons are ALL inactive while you are editing a PO. Click EDIT or SAVE button to activate them.
Submit Purchase Order Button -Marks the PO as having been submitted to the vendor. Submitted PO's can not be edited, except by user with specific privilege. You are usually better off entering a second PO for add on items.
Close Purchase Order Button -Closed PO's cannot longer be received. Closing a PO re-sets the on order quantity for any items on the PO that have not been received.
Void Purchase Order Button -PO's can only be Voided at the location where they were created. If any part of a PO is received you can no longer void that PO, you can Close it. Voiding removes the Last PO date as well as the Qty On Order or Qty on Suggested Order.
Copy Purchase Order Button -View the PO you wish to copy and click the Copy Purchase Order Button. A new PO is created for same Vendor. You can go on to edit Delivery Address, Bill To, and the items on the order.
Related Topics
Edit Purchase Order Detail at Store