To put the printer into programing mode:
The factory default settings are typically set for serial connection and 115,200 baud. See below if there are issues using these settings.
Make sure the power cable is connected, the paper is correctly placed in the paper tray and the cover is closed.
Note the the paper FEED button is the top button.
1.Power down the printer, then while holding the Feed button, press the Power button to turn on the power. Do not release the feed button.
2.A self test will print. Do not release the feed button. Wait about 3 more seconds, while the printer enters the Memory DIP switch setting screen.
3.Release the feed button.
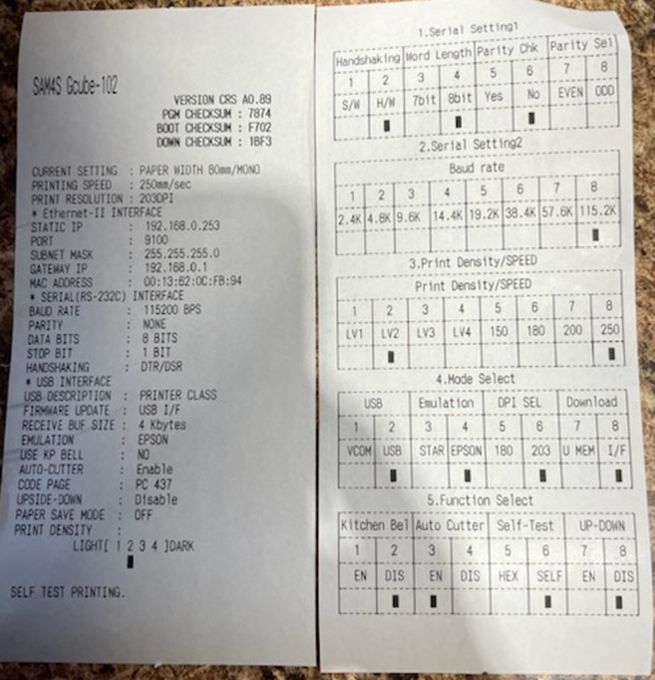
See sample self test at bottom of this topic.
The printer is now in programming mode, follow additional steps below for specific functions.
For serial connection..
Print self test above, to confirm serial settings. If the baud rate is 115,200, set Acme to same and all should work. No other steps should be necessary in most cases.
If you have long receipts you may find Acme sends data to the printer faster than the printer's memory can handle it. Parts of receipts or extra copies of receipts may not print.
If you need to change the baud rate follow the 3 steps above to put the printer into programming mode, then follow these 4 steps.
1.Press feed button for .5 seconds, the number should change from 1 to 2.
2.Press feed button for 2 seconds. Function should change to “serial baud rate”.
3.Press the feed button multiple times, until the number displayed on the front panel is 3.
4.Press and hold the Feed button until you hear a beep (about 5 seconds) this will save the settings and turn off the printer.
5.Hold feed button down and turn printer on. Release feed button. Self test that prints should confirm the change when compared to previous self test.
For USB Virtual Com
Set Software DIP switch 4 to "position" 1. to do so...
Follow the 3 steps above to put the printer into programming mode, then follow these 6 steps.
1.Unplug USB cable from the printer or the computer, whichever is easiest.
2.Quick Press feed button (.5 seconds) 3 times, Memory DIP Switch 4 (Mode) Function should print.
3.Press and hold the Feed button for about 2 seconds to change the mode from USB to Virtual Com.
4.Press and hold the Feed button until you hear a beep (about 5 seconds) this will save the settings and turn off the printer.
5.Hold feed button down and turn printer on. Release feed button. Self test that prints should confirm the change when compared to previous self test.
6.Re-connect printer and computer via the USB cable. The virtual port should be created, you can confirm this in device manager and set Acme accordingly.
Default baud rate is 115.2k.
You must set IGNORE CTS to Yes, not this is NOT done for true serial, only for virtual com (VCOM).
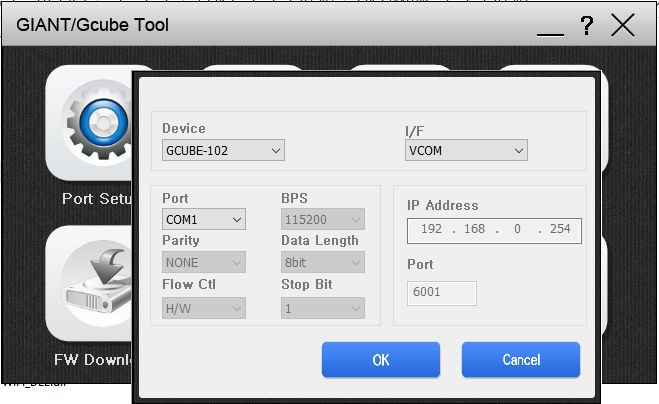
To send logo use GIANT&GCUBE Tool.exe
Select device.
Select I/F = VCOM, USB or Serial
Select Port
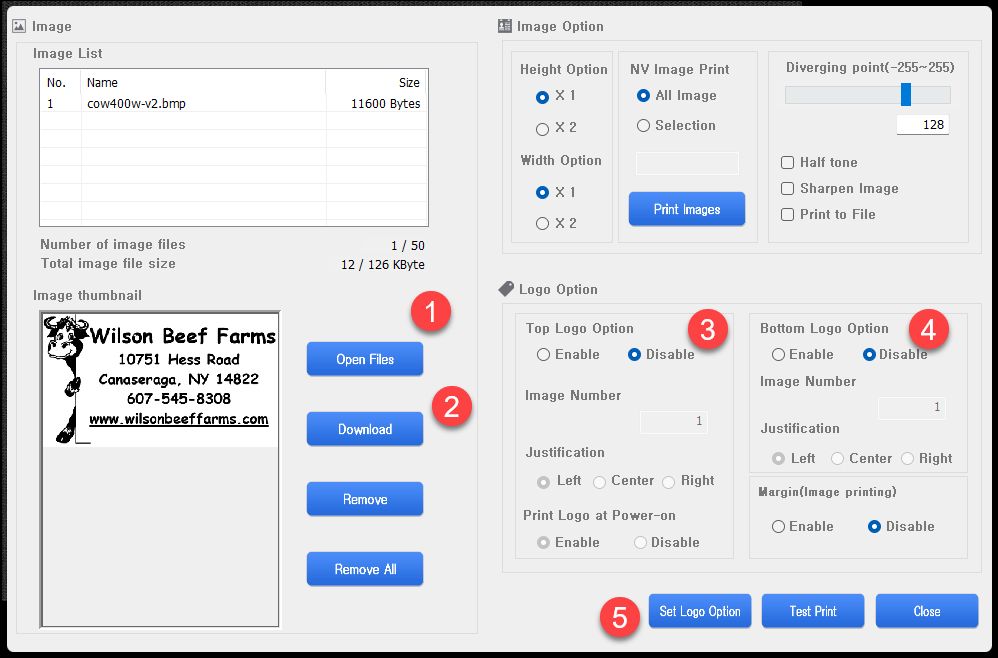
Open the graphic file, preview it and use the DOWNLOAD button to send it to the printer.
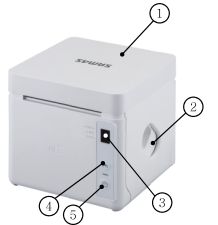
1.Cover Open
2.Open Button
3.Display (7-Segment Indicator)
4.Feed Button
5.Power Button
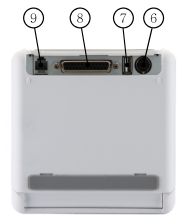
6.Power Jack
7.USB Port
8.Parallel Port
9.Cash Drawer Port
Above is USB/Parallel, below is USB/Serial/Ethernet

Self test example from G-Cube properly configured to use Serial:
If you have the long receipts issue mentioned above you would need to change baud from 115.2 to 9600 and do same in Acme.
