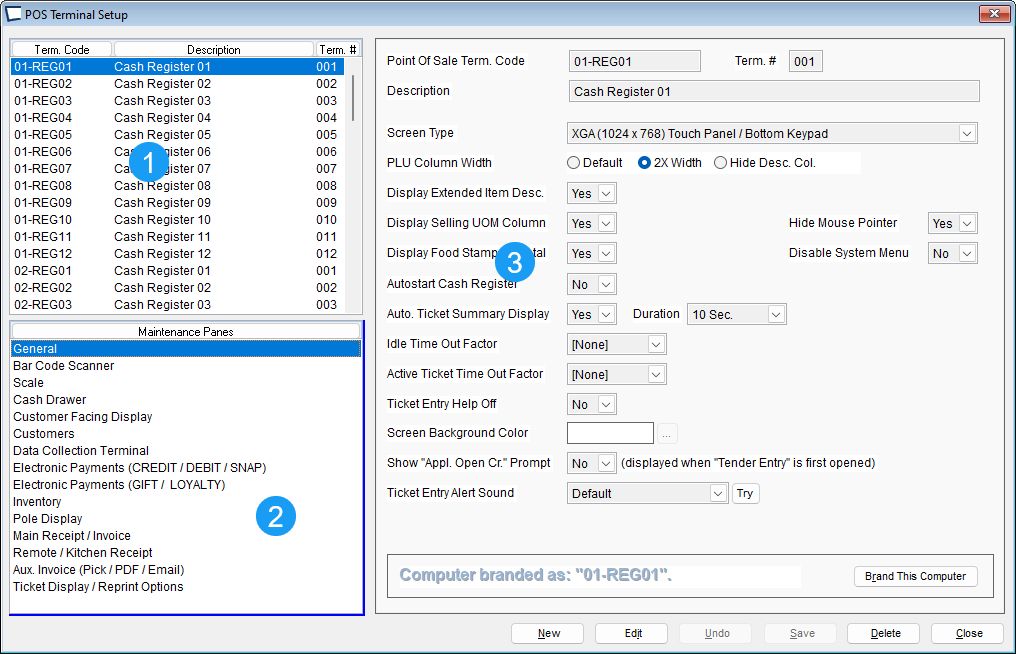
Click >Maintenance >POS Terminal Setup
Background

Section 1: Select the terminal you wish to set up.
Section 2: Select a feature to set up.
Section 3: Select options specific to the feature you chose in section 2.
If the computer you are on has been Branded this screen opens up to the terminal record tied to the brand. To brand a computer see Brand This Computer
All settings are PER TERMINAL. Each terminal (register) can have it’s own setup for different types of equipment. You could have a mix of serial and wedge scanners, full size laser and receipt printers, etc. Some lanes can have touch screens while others have standard screens etc.
You can add new Terminal records and change features/options from any computer, but the BRAND or TEST button only work for the computer you are on. In other words, you can configure the cash drawer for terminal two from any terminal that can run Acme. but to TEST that drawer you have to be logged into Acme on terminal two.
Terminal # -The number is used for the first segment of your receipt number. It also is used for the terminal ID if you do electronic payment processing (credit cards etc) within Acme.
Important: To aid reconciliation and properly process integrated electronic payments you should always assign each terminal a unique terminal number. Because of the many ways Acme is deployed this is not enforced during setup.
The Ticket Entry screen displays the Point of Sale Terminal Code on the title bar:

Do not brand two computers as the same POS Terminal, they could not be used at same time (assuming they shared same Acme database) and if they were used at different times or were part of different Acme databases (for example a store and a portable Acme) their their cash tray reconciliations would be negatively affected. For more information see Brand This Computer
7000 Series Terminals -aka "Wonder Bundle" setup and configuration